SHW Electric Height Adjustable Computer Desk sale worldwide, lots of customer receive their SHW Electric Height Adjustable Computer Desk! Though SHW Electric Desk package Come with user manual instructions, there are lot of customer contact us for SHW Electric Height Adjustable Computer Desk manual, SHW Electric Height Adjustable Computer Desk Instructions, SHW Standing Desk Manual, How do you Assemble an Adjustable Desk height?
SHW make a decision to edit the SHW Electric Height Adjustable Computer Desk manual online for our customer check anywhere anytime.
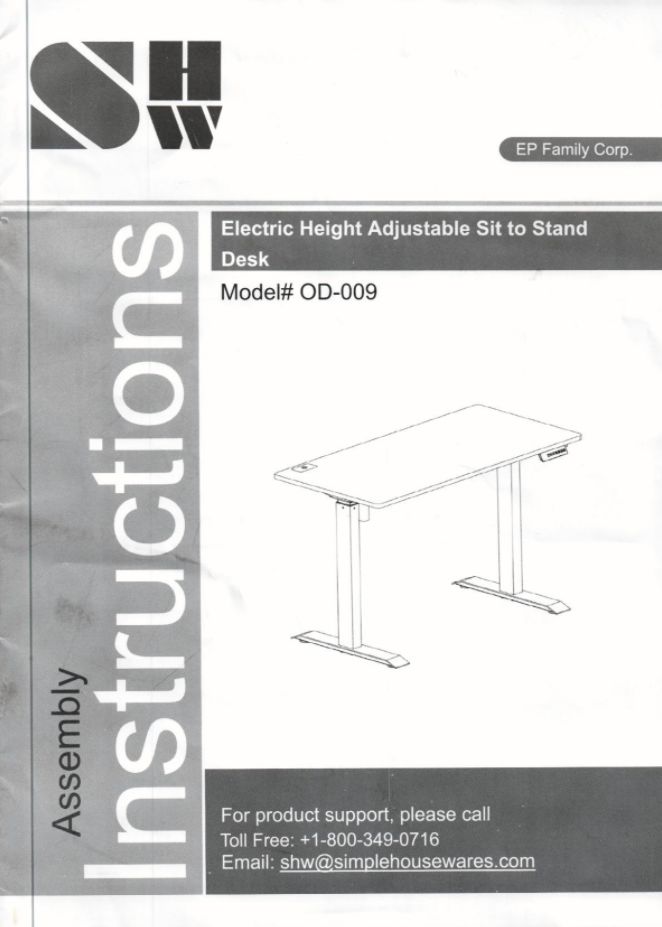
Electric Height Adjustable Sit to Stand Desk
Model # OD-009
SHW Electric Height Adjustable Desk
How do I Reset my SHW Standing Desk?
SHW Electric Height Adjustable Computer Desk reset
Reset Process
- Step 1. Press and hold the “Up + Down” Keys for a few seconds.
- Step 2. The LED Display will start to flash “000” and the table will slowly lower at the same time. After the table reaches the lowest height setting, the controller will beep twice.
- The Reset Initialization Process is now completed.

If you stop pressing / holding the Keys at any time during initialization, the initialization process will fail to complete. The LED Display will Show “—“. If this happens, press and hold the “UP + Down” Keys for a few seconds to resume the initialization process. When the process is done, the controller will beep twice. The initialization process must be completed for the height adjustment feature to operate properly.
After completing initialization, the height will be at it’s lowest setting. You may now press the “UP” or “Down” Keys to adjust table height. The LED display will automatically turn off after a few seconds of inactivity.
SHW Electric Height Adjustable Computer Desk Troubleshooting
SHW Electric Height Adjustable Computer Desk not Working
- Error Code: E-0
- Reason: Motor Parameter Error
- Solution: Please contact customer service at shw@simplehousewares.com for further assistance.
- Error Code: E-1
- Reason: Motor Parameter Error
- Solution: Please contact customer service at shw@simplehousewares.com for further assistance.
- Error Code: E-3
- Reason: Low Main Voltage
- Solution: 1. Please remove a few items off the table and try again, maxium weight limit is 110 lbs.
- 2. If the above step fails, please contact customer service at shw@simplehousewares.com for further assistance.
- Error Code: E-4
- Reason: Motor line open circuit
- Solution: 1. Remove the cable(Part M) from the Power Supply (Part F ) and reconnect
- 2. If the above step fails, please contact customer service at shw@simplehousewares.com for further assistance.
- Error Code: E-5
- Reason: Over-Current Protection
- Solution: Please contact customer service at shw@simplehousewares.com for further assistance.
- Error Code: E-6
- Reason: Over-Current Protection
- Solution: Please contact customer service at shw@simplehousewares.com for further assistance.
- Error Code: E-8
- Reason: Part F connection Failure
- Solution: 1.Disconnect and reconnect the cable line from part A to Part F.
- 2. If the above step fails Please contact customer service at shw@simplehousewares.com for further assistance.
- Other Error : Reset Require
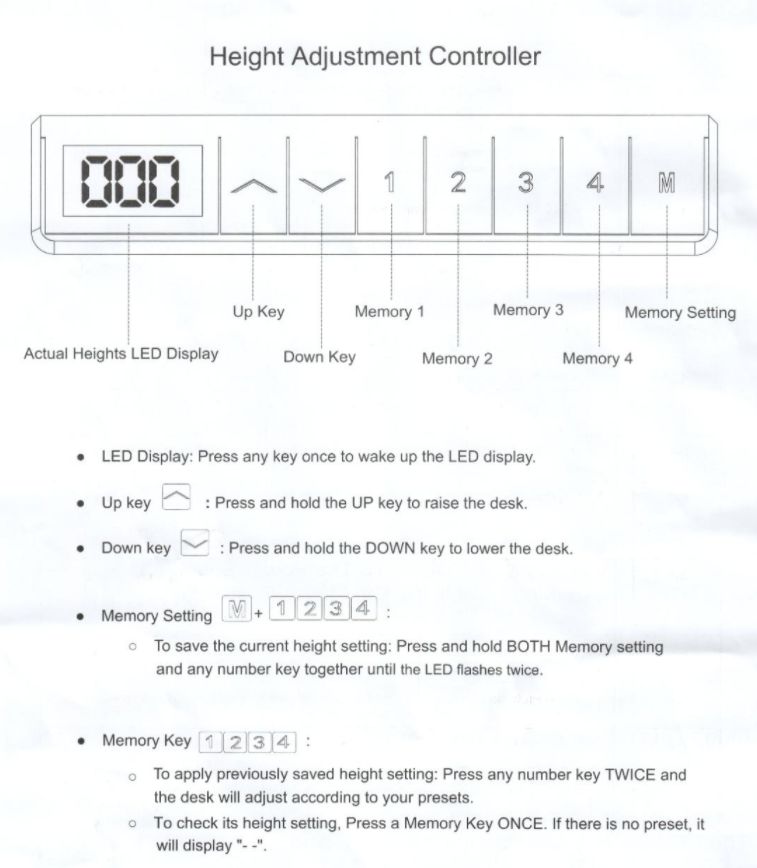
SHW Desk Height Adjustment Controller
How do I Adjust my SHW Standing Desk?
Up and Down Key
- Actual Heights LED Display
- LED Display: Press any key once to wake up the LED display.
- UP Key: Press and hold the UP key to raise the desk.
- DOWN Key: Press and hold the DOWN key to lower the desk
Memory Setting
To save the current height setting: Press and hold BOTH the M key and any Number key (1, 2, 3, 4) together until the LED flashes twice.
- Memory setting,
- To save the current height setting: Press and hold BOTH Memory setting
- and any number key together until the LED flashes twice
- Memory Key
- To apply previously saved height setting: Press any number key TWICE and the desk adjust according to your presets
- To check its height setting, Press a Memory Key ONCE. If there is no preset, it will display.
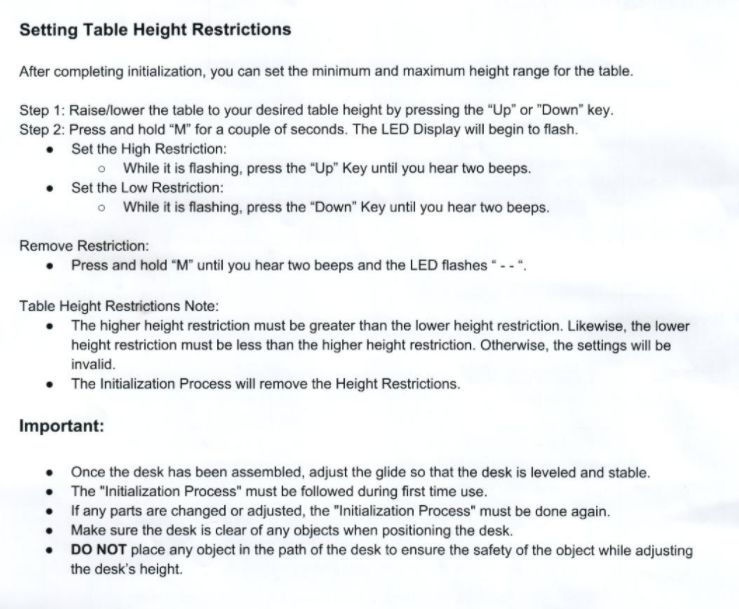
Setting Table Height Restrictions
- After completing initialization, you can set the minimum and maximum height range for the table
- Step 1: Raise / Lower the table to your desired table height by pressing the “UP” or “Down” Key.
- Step 2: Press and hold “M” for a couple of seconds. The LED Display will begin to flash.
- Set the High Restriction:
- While it is flashing, press the “UP” Key until you hear two beeps.
- Set the Low Restriction:
- While it is flashing, press the “Down” Key until you hear two beeps.
- Remove Restriction:
- Press and Hold “M” until you hear two beeps and the LED flashes “–“
- Table Height Restrictions Note:
- The higher height restriction must be greater than the height restriction. likewise, the lower height restriction must be less than the heighter height restriction. Otherwise, the settings will be invalid.
- The initialization process will remove the height restrictions.
- Important
- Once the Desk has been assembled, adjust the glide so that the desk is leveled and stable.
- The “Initialization Process” must be follower during first time use.
- If any parts are changed or adjusted, the “Initialization Process” must be done again.
- Make sure the desk is clear of any objects when positioning the desk.
- DO NOT place any object in the path of the desk to ensure the safety of the object while adjusting the desk’s height.
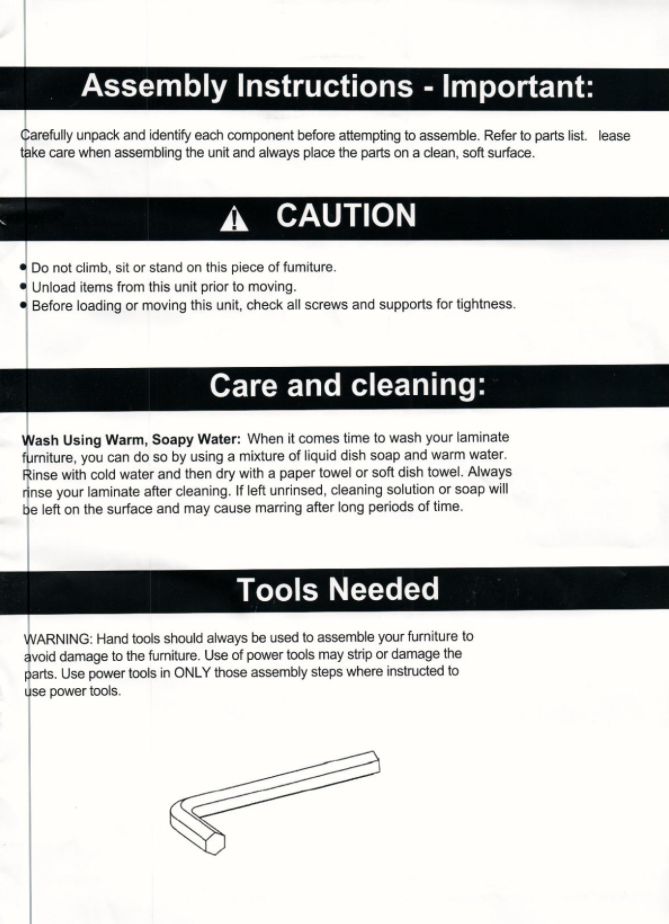
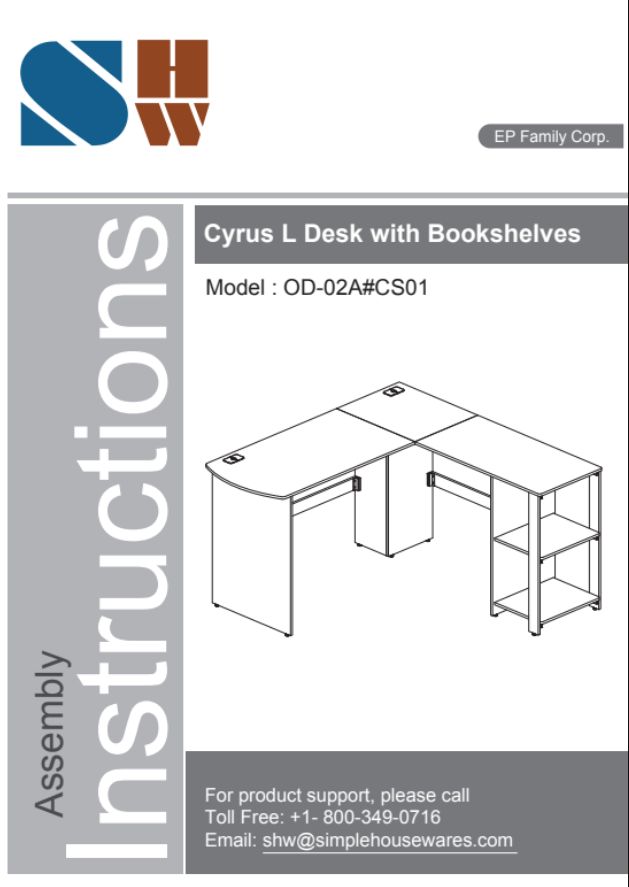
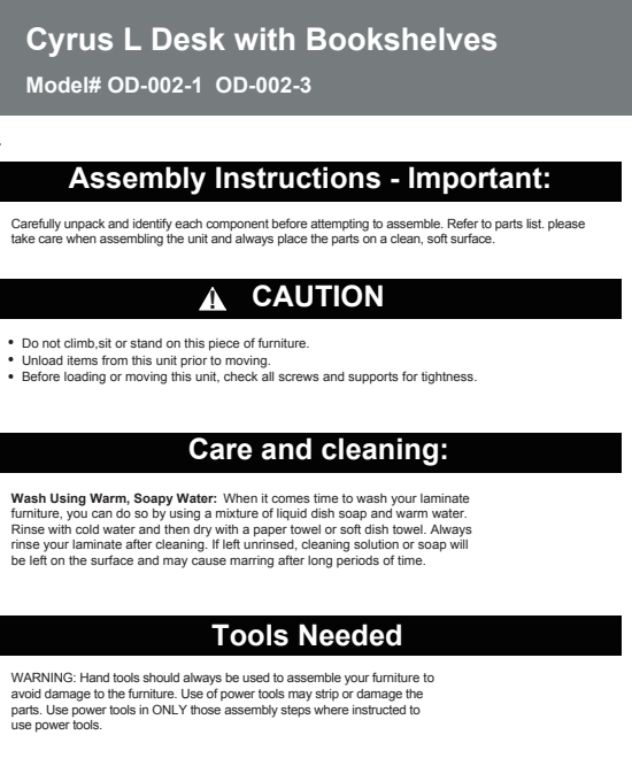
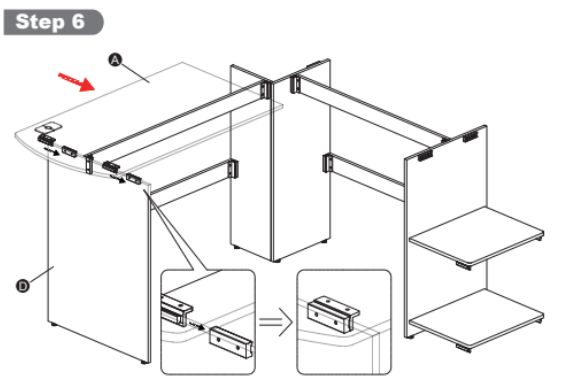
- Assembly Instructions – Important:
- Carefully unpack and identify each component before attempting to assemble. Refer to parts list. Please take care when assembling the unit and always place the parts on a clean, soft surface.
- Caution
- Do not climb, sit or stand on this piece of furniture.
- Unload items from this unit prior to moving.
- Before loading or moving this unit, check all screws and supports for tightness
- Care and cleaning:
- Wash Using Warm, Soapy Water: When it comes to wash your laminate furniture, you can do so by using a mixture of liquid dish soap and warm water . Rinse with cold water and then dry with a paper towel or soft dish towel. Always rinse your laminate after cleaning. If left unrinsed, cleaning solution or soap will be left on the surface and may cause marring after long periods of time.
- Tools Needed
- Warning: Hand tools should always be used to assemble your furniture to avoid damage to the furniture. Use of power tools may strip or damage the parts. Use Power tools in ONLY those assembly steps where instructed to use power tools.
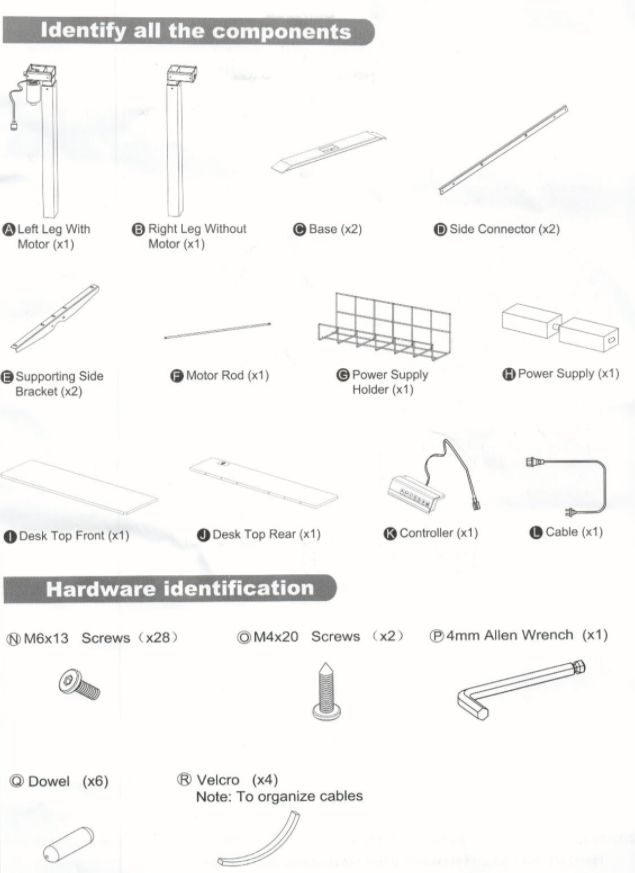
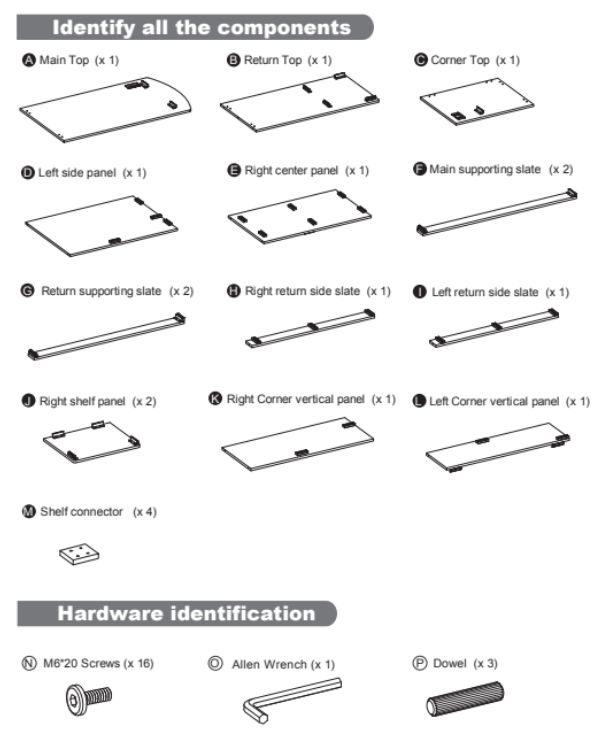
Identify all the components
- A. left leg with motor * 1
- B. Right Leg Without Motor *1
- C. Base *2
- D. Side Connector *2
- E. Supporting Side Bracket *2
- F. Motor Rod *1
- G. Power Supply Holder *1
- H. Power Supply *1
- I. Desk Top Front *1
- J. Desk Top Rear * 1
- K. Controller * 1
- L. Cable *1
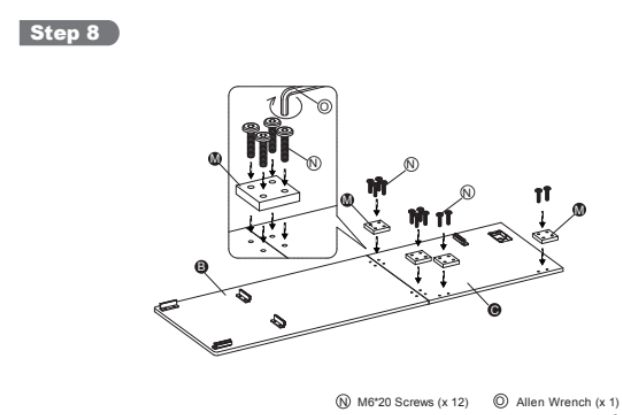
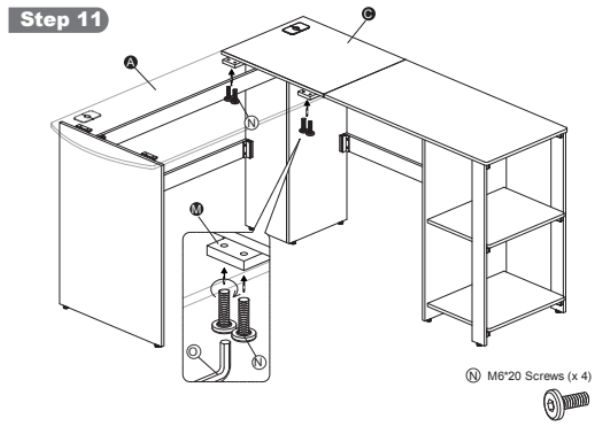
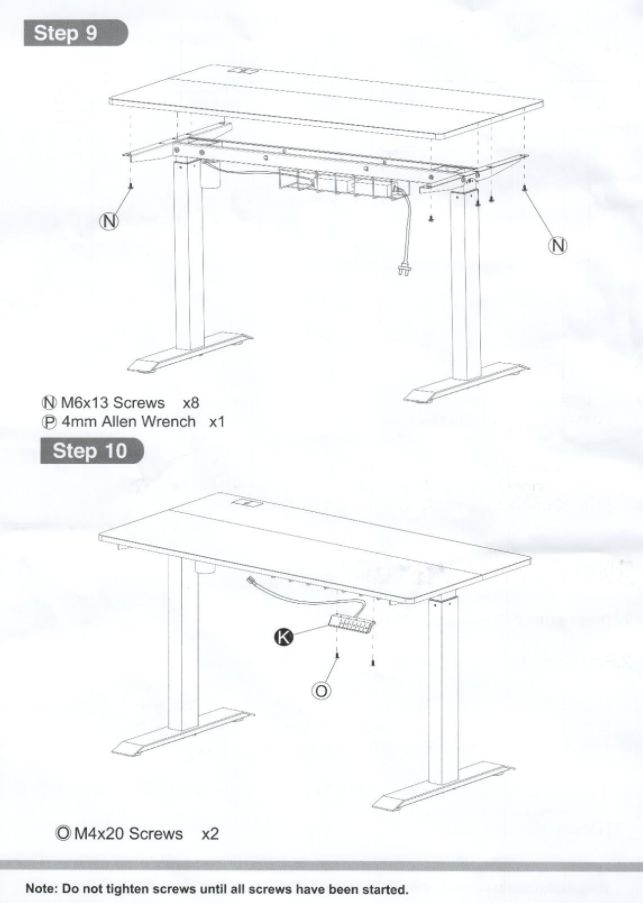
- N. M6* 13 Screws * 28
- O. M4*20 Screws *2
- P. 4mm Allen Wrench *1
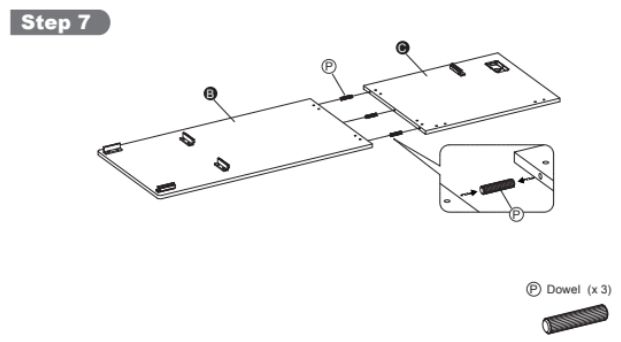
- Q. Dowel *6
- R. Velcro *4 Note: To organize cables
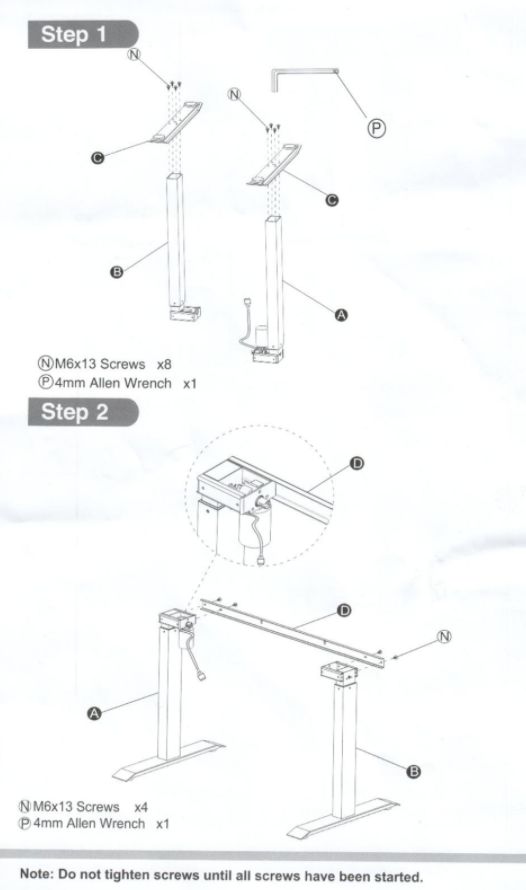
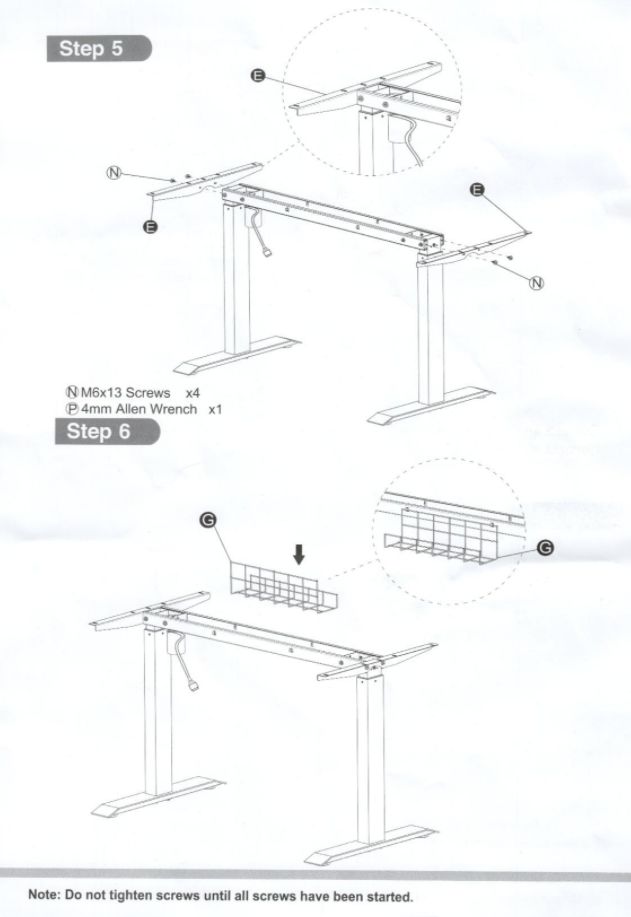
Note: Do not tighten screws until all screws have been started
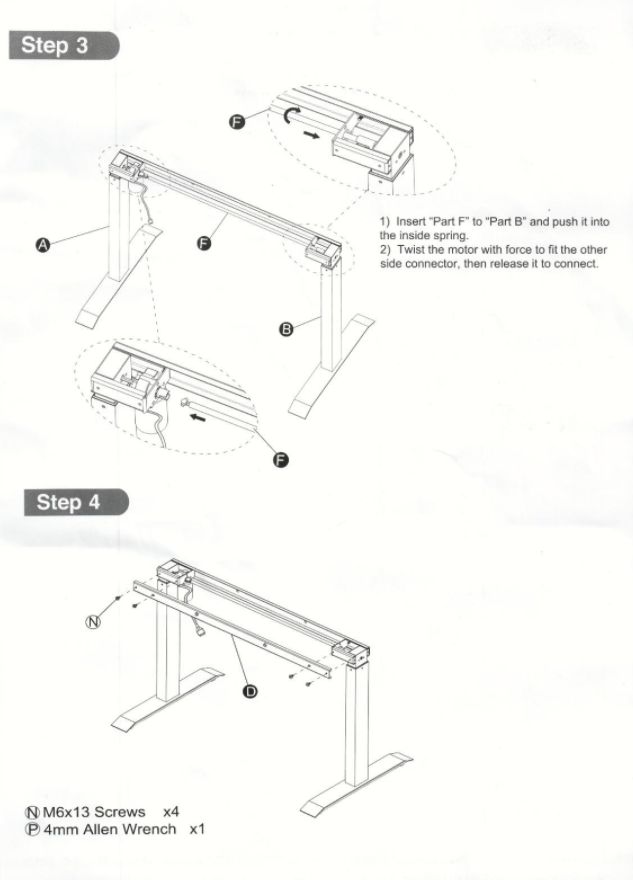
1. Insert “Part F” to “Part B” and push it into the inside spring.
2. Twist the motor with force to fit the other side connector, then release it to connect.
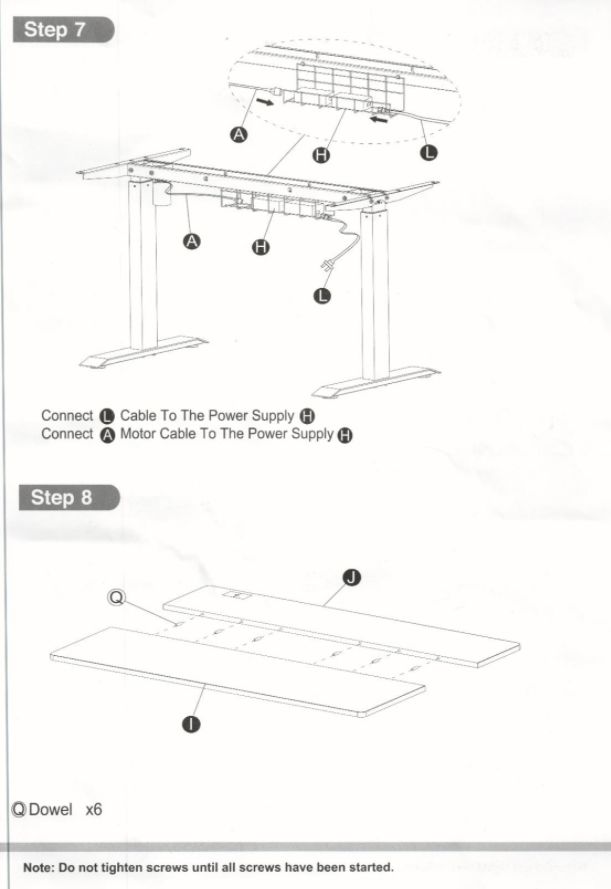
Connect L cable to the power supply
Connect A motor cable to the power supply
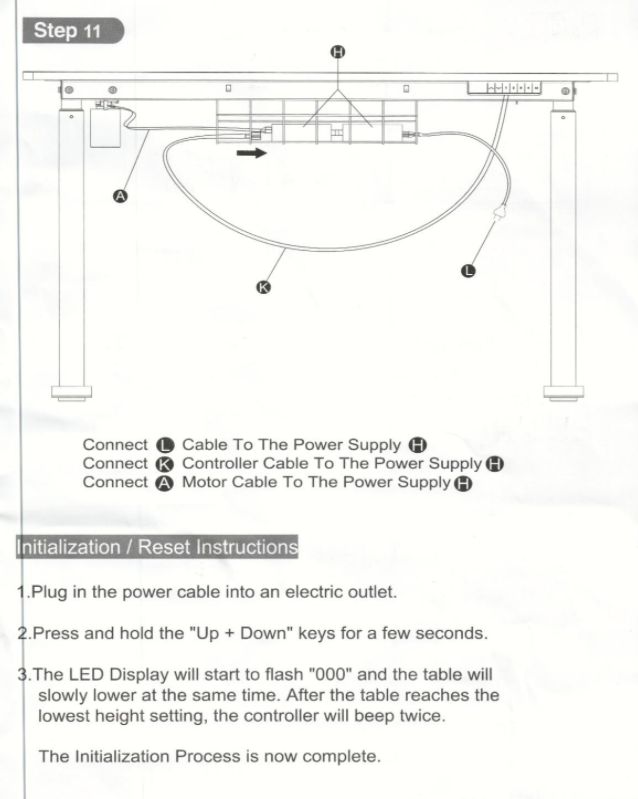
Connsct L Cable To The Power Supply H
Camera K Controller Cable To The Power Supply H
Connect A Motor Cable To The Power Supply H
Initialization / Reset Instructions
Plug in the power cable into an electric outlet
Press and hold the “Up + Down” keys for a law seconds.
The LED Display will start to flash “000″ and the table will slowly lower at the same time. After the table reaches the lowest height setting, the controller will beep twice,
The Initialization Process is now complete.